Ricotta and Orange Olive Oil Cake: Around the Table, delicious food for everyday – Julia Busuttil Nishimura

Around the Table

Julia Busuttil Nishimura

Plum

Pan Macmillan

ISBN: 9781760984915

Description:

Slow Sundays are for herbed roast chicken and silky smooth panna cotta. Eating outside means cheddar scones and fresh, spring salads. Friends coming by for afternoon coffee calls for a simple blackberry yoghurt loaf or comforting ginger cake with cream cheese frosting.

Beloved home cook Julia Busuttil Nishimura always knows the right dish for the occasion, weather or time of day. She also understands the power food has to bring people together, whether that’s to prepare a meal or enjoy the delicious results.

With recipes ranging from quick, flavourful meals for busy weeknights to simple indulgences for summer feasts, Around the Table perfectly matches dishes to time and place. It includes recipes laden with personal meaning – Mediterranean classics from Italy and Malta, and Japanese dishes Julia has learned from her husband, Nori – that will soon become favourites around your table, too. 

It is no secret that I love ricotta and extra-virgin olive oil. These two ingredients have featured heavily in my cooking since I was young. Here they marry in this very simple cake where the ricotta provides
fluffiness and the olive oil adds richness and a very moist crumb. This is one of those back-pocket recipes that can be whipped up at a moment’s notice, with no special equipment necessary
.” p79

Ricotta and Orange Olive Oil Cake

SERVES 8
250 g caster sugar
zest of 2 oranges
3 eggs
100 ml freshly squeezed orange juice
150 ml extra-virgin olive oil
250 g (1 cup) fresh full-fat ricotta
250 g (1 ⅔ cups) self-raising flour
pure icing sugar, for dusting (optional)


Method

Preheat the oven to 180°C. Grease and line a 23 cm round cake tin. Place the sugar and orange zest in a large bowl. Rub the orange zest into the sugar until it is damp and fragrant. Whisk in the eggs until combined. Add the orange juice and pour in the olive oil. Add the ricotta and whisk it all together, then gently mix in the flour until just combined.


Pour into the prepared tin and bake for 45 minutes or until a skewer inserted into the middle of the cake comes out clean. Allow the cake to cool in the tin for 10 minutes, then remove from the tin and continue to cool on a wire rack. Once cool, dust with icing sugar if desired, then serve.


The cake will keep in an airtight container for 3–4 days.

Around the Table by Julia Busuttil Nishimura, published by Plum, RRP $44.99,

photography by Armelle Habib

#MondayMunchies Roadside Treasure Cake ( Apple & Blackberry Tray Cake): Family Food & Feelings – Kate Berry


‘Family, Food and Feelings by Kate Berry, Published by Plum, RRP $39.99, Photography by Kate Berry’


“When we lived in the hills, every autumn the girls and I kept a close eye on the roadside apple trees, checking on their progress and making sure no one had swooped in before us. It was a game of luck. Sometimes we’d get in first; sometimes we’d lose to another apple poacher, or to the birds. But when we did win, it was on. We’d park the car under
the tree, grab the baskets from the boot and take our positions: Pepper on the roof for the higher apples, me on the boot and Maya at ground level.
As for blackberries, well those guys were just everywhere, and they’re prickly. So even though they taste delicious, they just weren’t as fun. But I do love the metaphor that can be found somewhere within the hostile blackberry bush … with a little care and time you’re rewarded with something sweet and delicious.” p115

180 g (1½ cups) spelt flour
1 teaspoon bicarbonate of soda
1 teaspoon baking powder
55 g (½ cup) hazelnut meal
155 g (2/3 cup) brown sugar
3 free-range eggs
100 g coconut oil
150 g plain yoghurt
2 apples (we’d use whatever variety we happened to find), cored and cut into eighths
200 g blackberries, fresh or frozen

Preheat the oven to 180°C (fan-forced). Line a lamington tin with baking paper.
Sift the flour, bicarbonate of soda and baking powder into a mixing bowl.

Stir in the hazelnut meal and set aside.

Place the sugar and eggs in the bowl of an electric mixer fitted with the whisk attachment and whisk for 5 minutes or
until thick and pale. Add the coconut oil and yoghurt and whisk until well combined.

Gently fold the flour mixture into the yoghurt mixture until just combined – take care not to overmix.
Pour the batter into the prepared tin and spread it out nicely. Arrange the apples in an even layer on top of the batter, then squish the blackberries in between.

Bake for 40 minutes or until golden on top and firm to the touch, and a skewer inserted in the centre comes out clean.

Allow to cool completely in the tin, then cut into squares and serve.

SERVES 16

Review: The Food of Argentina: Asado, Empanadas, Dulce De Leche and More – Ross Dobson & Rachel Tolosa Paz

the-food-of-argentina-9781925418712

The Food Of Argentina

Asado, Empanadas, Dulce De Leche & more

Ross Dobson & Rachel Tolosa Paz

Smith Street books

ISBN: 9781925418712

RRP $49.99


Description:

With more than eighty recipes, The Food of Argentina celebrates the very best dishes from a passionate foodie nation which, until now, have been kept under relative lock and key.


The Food of Argentina is a rich and visual celebration of Argentinean food filled with beautiful location and food photography that takes the reader on a gastronomic journey into a little-known cuisine that is tipped to become the next global food trend for food lovers everywhere. Some people may have heard of Argentinean asados–the legendary meat barbecues that are so beloved by locals, but The Food of Argentina celebrates so much more than a carnivore’s dream.


Come inside the homes and families of Argentina and discover the very best recipes this huge food loving nation has to offer. Often influenced by their European heritage but with a distinct South American feel, home-style dishes include pastas and gnocchi, potato tortillas, and stews and casseroles, as well as sweet offerings including dulce de leche, strudels, and caramel flans. Or head outside and discover the local delicacies offered in Argentina’s tiny bars and eateries: chorizo rolls with salsa criolla, traditional empanadas, veal croquettes, and fruit-filled pastries. And let’s not forget the famous mate–a strong herbal tea that is Argentina’s traditional drink and adored by locals countrywide. Lose yourself in The Food of Argentina and discover a whole new cuisine from the comfort of your own kitchen.


My View:

Until I started perusing this book I had no idea how much in common, gastronomically, Australia has with Argentina. As I turned the pages I saw many of my favourite recipes – gnocchi with beef ragu, steak sandwiches, tomato and ricotta tart, silver beet pie, pizza, rice pudding, caramel flan, apple cake…the list goes on. Sometimes the recipes may have an interesting twist on the version I am used to but interesting is flavoursome and good.  And then there are the foods I associate with traditional Argentina – empanadas, tortillas…dulce de leche. This book is packed with flavour.


So where do I begin?My favourites  I think include the Asdao – flame grilled foods to share with family and friends. There is such a large choice of foods to cook this way – meats, breads, pizza and the side dishes to serve with them.  A veritable feast!


And then the la merienda – a sort of afternoon tea – comprising cakes, pastries… toasted sandwiches. Was I surprised to find a comfort food from my childhood (and a recipe I should revive) Cuadraditos de Coco Y Mermelda or you may know this as Coconut and Jam Slice. My late mother was fond of making this as a snack to have when we returned home from school or for afternoon tea. I can’t wait to make this myself and share with my own family.


Argentina – “A place where the people understand that food, time and talking brings us together.” (p.11)


No-Bake Poached Pear Flan with Lime Cream: The Good Carbs Cookbook by Dr. Alan Barclay, Kate McGhie & Philippa Sandall

Good Carbs Cookbook

Images and recipes from The Good Carbs Cookbook by Dr. Alan Barclay, Kate McGhie & Philippa Sandall Murdoch Books RRP $$39.99 Photography by Alan Benson


No-bake Poached Pear Flan with Lime Cream

“Sometimes a traditional pastry crust just doesn’t do justice to a spectacular filling. This is one of those times. This no-need-to-cook food processor pastry is chock full of flavour, and is refrigerated so it can be prepared the day before. So too can the ‘creamy’ cheese filling. Each pear variety has its own personality in texture and flavour. Choose a mild and sweet variety with subtle, fragrant citrus notes – bartlett pear comes to mind.” p.224


No Bake Poached Pear Flan With Lime Cream

PREPARATION TIME: 30 minutes | COOKING TIME: 15 minutes | SERVES: 8


1 cup (65 g/2¼ oz) shredded coconut

100 g (3½ oz) hazelnuts or almonds

12 pitted soft dates, chopped

1 teaspoon finely grated ginger, plus
2 cm (¾ in) piece ginger, peeled

1 teaspoon ground cinnamon

4 medium pears

½ cup (110 g/3¾ oz) caster (superfine) sugar

2 whole star anise

1 small lime, thinly sliced

2 cups (500 ml/17 fl oz) soda water (club soda)


Lime cream 

¾ cup (200 g/7 oz) ricotta

½ cup (100 g/3½ oz) reduced-fat cream cheese

½ cup (130 g/4½ oz) natural yoghurt

1 teaspoon finely grated lime zest

2 tablespoons warmed honey


Line a 23 cm (9 in) flan (tart) pan with baking paper with overhanging sides to make it easy to lift the flan out. Put the coconut in a food processor and blitz until fine. Add the hazelnuts, dates, finely grated ginger and cinnamon and pulse to a fine-crumb texture. Don’t worry if it is a bit more coarse than fine.

Tip the mixture into a bowl and, using your hands, clump it together and press it evenly into the base and sides of the prepared tin.  Refrigerate for about 20 minutes, until firm.

Peel the pears, cut into thick wedges and remove the core (leave the stalk on for decoration if you like). Put the sugar, peeled ginger, star anise, lime and soda water in a large pan. Stir over medium heat until the sugar dissolves, then reduce the heat to low and drop in the pears.

Cover the pan and gently simmer for about 10 minutes, or until the pears are just tender. Remove the pan from the heat and leave the pears to cool in the liquor. Lift the pears out with a slotted spoon and drain well.

Whisk together the ricotta, cream cheese, yoghurt, lime zest and 1½ tablespoons of the honey until smooth and creamy. Spoon the mixture into the flan and arrange the pears on top. Brush the pears with the remaining honey.


Frangipane Dream: I’m Just Here for Dessert – Caroline Khoo

Happy Mothers Day!

I'm Just Here For Dessert

Recipes and Images from I’m Just Here for Dessert by Caroline Khoo (Murdoch Books)


FRANGIPANE DREAM
MAKES: enough filling for four small 10 cm (4 inch) tarts
PREP TIME: 10 minutes

INGREDIENTS
• 90 g (31/4 oz) unsalted butter, softened
• 100 g (31/2 oz) caster (superfine) sugar, plus an extra teaspoon
for decorating
• 2 eggs
• 90 g (31/4 oz) almond meal
• 15 g (1/2 oz) plain (all-purpose) flour
• 15 g (1/2 oz) soft icing mixture or icing (confectioners’) sugar
• pinch of fine salt
• 4 small plain pastry tart shells (see recipe and note on p. 138)
• handful of frozen berries

METHOD
1. Beat the butter in the bowl of a stand mixer fitted with the paddle attachment over a medium speed until soft, then add the caster sugar and continue to beat until light and fluffy.
2. Add one egg at a time until fully incorporated.
3. Add all of the remaining ingredients except the frozen berries to the bowl and mix on high speed for 1–2 minutes.
4. Divide the mixture between the tart shells, and sprinkle some frozen berries into each shell. Push the berries down gently with your fingers so they are slightly submerged in the frangipane filling.
5. Bake for 4 minutes, then sprinkle the extra caster sugar on top of each tart. Return the tarts to the oven and bake for another 8–10 minutes, or until golden.
TIP Allow the tarts to cool, then top with a few slices of fresh strawberry and some fresh blueberries. Add a pretty edible flower too, if you like.


Frangipane Dream

PLAIN PASTRY

INGREDIENTS
• 200 g (7 oz) unsalted butter, softened
• 120 g (41/4 oz) soft icing mixture or icing (confectioners’) sugar
• 11/2 eggs (see page 30)
• 1 teaspoon vanilla extract or essence (optional)
• 370 g (13 oz) plain (all-purpose) flour, plus extra for dusting
• canola oil cooking spray
EQUIPMENT
• electric kitchen scales
• measuring spoons
• stand mixer with paddle attachment
• good-quality plastic wrap
• good-quality baking paper
• rolling pin
• 6 or 7 tart tins 10 cm (4 inches) in diameter
• sharp knife
• scissors
• baking beads/uncooked rice or beans
• baking tray

METHOD
1. Place the softened butter in the bowl of a stand mixer and beat on
a medium speed until creamy and soft.
2. Reduce the speed to low and slowly add the soft icing mixture a little at a time until completely incorporated.
3. For plain pastry, add the eggs and vanilla now. For chocolate pastry, add the eggs and egg yolk until fully mixed in.
4. Slowly add the flour. If making chocolate pastry, add the cocoa and salt now too. Mix until a dough has just started to form.
5. Transfer the dough from the stand mixer to a clean bench lightly dusted with flour and knead with clean, lightly floured hands for a few minutes until you have a smooth ball. Don’t overwork the dough, just knead it enough to bring it together into that smooth ball. Cut the dough in half and then form each half into a ball again. Push down on each ball to create a disc, and then tightly wrap both discs in plastic wrap.
6. Chill the dough in the fridge for 2 hours. (You can leave it overnight if you are making this ahead of time.) The dough will need time to come to room temperature before you roll it out.
ROLLING OUT YOUR PASTRY
METHOD
1. Place one disc of dough between two sheets of baking paper (see p. 140)then begin to roll out to form a thin rectangle of pastry about 8
6 cm (31/4 21/2 inches) and about 1 cm (1/2 inch) thick. Repeat with the other dough disc.
2. Lightly spray your tart tins with the canola oil.
3. Using a sharp knife, cut each rolled sheet of pastry into 6 pieces, each larger than a tart tin. That way, there will be overhanging pastry when you line the tins. Use your fingers to gently but firmly push the dough into the tart tin. If any area is short of pastry, add some dough so that it is covered. Repeat with the rest of the pastry and the tart tins.
4. Run your rolling pin over each tart tin so any overhanging pastry
is trimmed off and you have a clean edge.
5. Poke a few holes in the base of each tart with a fork.
6. Cover the pastry-lined tins tightly with plastic wrap, then place the tins in the fridge and allow to chill for at least 3 hours, or overnight.
7. Preheat the oven to 170°C (325°F) fan-forced (FF).
8. Cut out six small squares of baking paper, each big enough to cover
a tart tin.
9. Fill the lined tart tins with baking beads, then blind bake for 6 minutes.
10. Remove the baking paper and baking beads then return the tart shells to the oven for a further 10–12 minutes (or 7, if you are making frangipane tarts, see note below), until slightly golden, then allow to cool completely in their tins on a wire rack.
NOTE If making frangipane tarts, remove the tart shells from the oven after
7 minutes of extra baking time then follow the instructions on page 150.

Giant Lamington: A Whole New Way To Eat – Vladia Cobrdova

Recipes and Images from A Whole New Way to Eat by Vladia Cobrdova (Murdoch Books)

GIANT LAMINGTON WITH RASPBERRY KAKADU JAM


+ Vegetarian

+ Gluten-free

Considered a gift of the Dreamtime, the Kakadu plum is Australia’s star superfood. They have exceptional nutritional and antiseptic properties.“p.230


prep time: 35 minutes

cooking time: 40 minutes

Serves 6–8


6 eggs

115 g (4 oz/1/3 cup) honey

80 ml (2½ fl oz/1/3 cup) melted coconut oil

1 teaspoon vanilla bean paste

65 g (2½ oz/½ cup) coconut flour

½ teaspoon baking powder

100 g (3½ oz/1 cup) almond meal

35 g (1¼ oz/½ cup) shredded coconut


Kakadu jam

170 g (6 oz) raspberries, fresh or frozen and defrosted

50 g (1¾ oz/¼ cup) coconut sugar

1 tablespoon Kakadu plum (salty plum) powder, or use the zest of 1 orange

45 g (1½ oz/¼ cup) chia seeds

2 tablespoons coconut water


Cacao frosting

40 g (1½ oz/¼ cup) coconut oil

55 g (2 oz/½ cup) cacao powder

60 ml (2 fl oz/¼ cup) coconut cream


Preheat the oven to 160°C. Lightly grease a 30 x 12 x 10 cm (12 x 4½ x 4 inch) loaf (bar) tin and line it with baking paper, leaving the sides overhanging.


Use an electric mixer fitted with the whisk attachment to whisk the eggs and honey for 5 minutes or until well combined. Add the coconut oil and vanilla bean paste and whisk for another 2–3 minutes until well combined.


Combine the coconut flour, baking powder and almond meal in a separate bowl. Gently fold into the egg mixture until just combined, then spoon into the prepared tin and bake for 40 minutes or until a skewer comes out clean. Remove from the oven and allow to cool in the tin.


Meanwhile, to make the jam, combine the ingredients
in a blender and blend until smooth. Transfer to a small bowl, cover and refrigerate for 15 minutes or until set.


To make cacao frosting, put the coconut oil in a frying pan with 60 ml (2 fl oz/¼ cup) of water and cook over low heat until the oil melts. Add the cacao powder and coconut cream and stir for 2 minutes or until combined. Remove from the heat and set aside to cool.


Transfer the cake to a serving plate. Spread with jam and drizzle with the frosting. Scatter with shredded coconut.

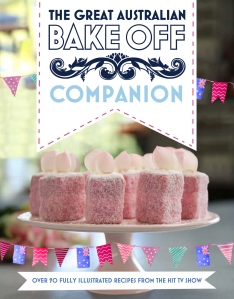
Pumpkin Pie Eclairs: The Great Australian Bake Off companion – BBC Worldwide

great-australian-bake-off-the

Extract from The Great Australian Bake Off Companion (Hachette Australia, November 2016)

Pumpkin Pie Eclairs

p152-pumpkin-pie-eclairs

For the éclairs

175g unsalted butter, at room temperature

200g whole milk

5g salt

10g sugar

225g cake flour

300g eggs


For the pumpkin mousse

500g Kent pumpkin

320g whipping cream

90g caster sugar

12g gelatine sheets, silver grade

180g egg yolks

120g white sugar

½ teaspoon ground cinnamon

¼ teaspoon freshly grated whole nutmeg

½ teaspoon vanilla paste


For the caramel chocolate décor

250g caramel chocolate melts

10g cocoa butter


For the pepita praline crumb

100g white sugar

20g pepitas


  1. Preheat the oven to 165°C and place a shallow pan at the bottom. Line two baking trays with silicone baking mats. Bring 200ml water, the butter, milk, salt and sugar to the boil. Meanwhile, sift the flour and reserve. When the liquid comes to the boil, remove from the heat and quickly stir in the flour all at once. Return to the heat and continue to cook, stirring continuously for a couple of minutes or until the mixture begins to stick to the bottom of the pot. Put the hot mixture into a stand mixer with a beater attachment and mix for a minute or two to release steam and cool slightly. Gradually add the eggs while mixing on medium speed until smooth and glossy. Add a little more egg if required to reach the correct consistency.
  2. Put the pastry mixture into a large heatproof piping bag fitted with a large round nozzle. Pipe 15cm lengths onto the prepared baking sheets. You should have enough batter for eight per sheet. Using a wet finger, dab any peaks of pastry. Bake for 40 minutes with a little boiling water poured into the preheated pan at the bottom of the oven.
  3. When cooked, remove from the oven and slit each éclair with a bread knife and open out to expose doughy middles. Return to the oven for another 10–15 minutes to completely dry out. Remove and cool on wire racks for 10 minutes then place in the refrigerator until required for assembly.
  4. Preheat the oven to 180°C. To make the pumpkin mousse, remove seeds and skin from the pumpkin and slice into 1cm thick pieces. Arrange the pumpkin on a lightly greased tray and bake for 20—25 minutes or until soft. Meanwhile, whip the cream with the caster sugar until soft peaks form and reserve in the refrigerator. Bloom the gelatine sheets in iced water.
  5. Make a pâte à bombe by whisking the egg yolks and 120g white sugar in a bowl over a hot water bath until thick and frothy. Remove from the heat.
  6. Remove the pumpkin from the oven and blitz with a stick blender. Sieve to obtain 250g puree. Remove the gelatine sheets from the cold water and squeeze out excess water. Mix the gelatine with about 50g puree in a small glass bowl and microwave for 20 seconds to melt the gelatine, then stir.
  7. Whisk the remaining pumpkin, spices and vanilla paste into the pâte à bombe in a stand mixer then add the gelatine mix. Transfer the mixture to a shallow dish to cool quickly in the refrigerator. The mixture should be approx. 20°C. Stir a small amount of reserved whipped cream into the cooled pumpkin mix to loosen then add the remainder, folding through. Be sure to add the cream before the mix sets. Place in the refrigerator to firm up until ready to assemble
  8. For the pepita praline crumb, heat a small saucepan over medium–high heat. Add 10ml water and sugar. Cook to a light caramel, rolling the syrup around the saucepan to ensure it cooks evenly. Add the pepitas and stir. Pour onto a silicone mat to cool. When cool, break up into pieces, put into a heavy plastic bag and smash with a meat mallet to create a coarse crumb. Reserve for assembly.
  9. To make the caramel chocolate décor, place the chocolate melts in a microwave proof bowl and cook at a low power for about 3 minutes or until just melted (approx. 46°C). Allow to cool to about 34°C before proceeding. Mix in the cocoa butter and stir until fully combined. Let cool to 30°C, stir thoroughly and pour into a silicone piping bag.
  10. To assemble the pumpkin pie éclairs, fill a large piping bag fitted with large star nozzle with pumpkin mousse. Fill the éclairs with the pumpkin mousse. Sprinkle pepita praline crumb over the top of the mousse. Finish the éclairs with thin stripes of chocolate.


Auntie Susan’s Lemon Myrtle Cake: The Natural Cook – Matt Stone

The Natural Cook

 Images and recipes from the Natural Cook by Matt Stone (Murdoch Books)

photography by Matt Roper available from 1st August $39.99


Auntie Susan’s Lemon Myrtle Cake

“For as long as I can remember, my Auntie Susan has baked the most amazing cakes. For years I tried to get her to give me a book with all her recipes. Though I’m still waiting for that book, she shares my passion for native foods and has developed this recipe for me. It’s a super simple cake packed with flavour.” (p.30)


Ingredients

155 g (5½ oz/1 cup) macadamia nuts

180 g (6½ oz) butter

150 g (5½ oz) sugar

2 eggs, at room temperature

2 teaspoons baking powder

1 teaspoon bicarbonate of soda (baking soda)

300 g (10½ oz/2 cups) freshly milled flour

185 ml (6 fl oz/¾ cup) buttermilk

2 teaspoons dried lemon myrtle

edible flowers, to decorate (optional)


Icing

3 egg whites

210 g (7½ oz) caster (superfine) sugar

210 g (7½ oz) butter

2 teaspoons dried lemon myrtle

Note: Most supermarkets stock lemon myrtle, and it’s a cinch to order online. You can also use lemon myrtle teabags – just remove the leaves from the bag and grind them to a fine consistency. This icing can be used for any cake or muffin. Substitute lemon myrtle with any flavour you like.

Aunty Susans Lemon Myrtle Cake

Method

Preheat the oven to 160˚C (320˚F). Grease a 20 cm (8 in) round cake tin and line the base and side with baking paper.

Spread the macadamia nuts evenly on a baking tray and roast for 12 minutes, or until golden brown, then set aside to cool. Turn the oven up to 170˚C (340˚F).

Using an electric mixer fitted with the paddle attachment, beat the butter until smooth. Add the sugar and cream the two ingredients for 5 minutes, or until light and fluffy. Add 1 egg at a time, making sure the previous one is incorporated before adding the next. Beat for a further 5 minutes.

In a food processor, blitz the macadamia nuts to form a rough breadcrumb consistency. Add the remaining ingredients, except the edible flowers, and the nuts to the butter mixture and beat until smooth. Pour into the cake tin and bake for 40–45 minutes, or until lightly golden. Gently press on the top of the cake – if it bounces back, it’s ready. Remove from the oven and let it cool for 10 minutes before turning out onto a wire rack to cool further.

To make the icing, fill a medium saucepan one-third full of water and place over medium heat. Bring to a light simmer. Put the egg whites and sugar into a stainless steel bowl. Using a whisk, briefly mix until the sugar has been incorporated. Place the bowl over the simmering water to create a double boiler and, stirring constantly, heat the mixture until the sugar has dissolved.

Using an electric mixer or hand-held electric beaters, whisk the egg mixture at high speed for 10–12 minutes; it will become white, glossy and thick. Keep whisking until the mixture is cool.

Switch to a paddle attachment if you have one, then mix on medium speed, adding the butter in four batches. Beat until thick and creamy, then add the lemon myrtle and stir until combined. Spatula onto the cake with enthusiasm and decorate with edible flowers, if using.

Coconut, Raspberry & Chocolate Tarts: Chocolate – Kirsten Tibballs

Chocolate - Cover

Images and recipes from Chocolate by Kirsten Tibballs (Murdoch Books) RRP $49.99 available now in all good bookstores and online.

Coconut, Raspberry  & Chocolate Tarts

MAKES: 8  Difficulty: Easy

If you want to simplify this recipe you can replace the made raspberry jelly with a good-quality store bought raspberry or berry jam.


Coconut, Rasberyy, and Chocolate Tart

Ingredients

90 g (31/4 oz) unsalted butter

60 g (21/4 oz/1/2 cup) icing (confectioners’) sugar

15 g (1/2 oz) almond meal

20 g (3/4 oz) desiccated (shredded) coconut

30 g (1 oz/about 1/2) whole egg

160 g (51/2 oz) plain (all-purpose) flour, plus extra for dusting

1/4 teaspoon baking powder

1/4 teaspoon salt


Coconut shortbread pastry

In an electric mixer with a paddle attachment, beat the butter on medium speed until it is a thick, smooth paste. Sift in the icing sugar then add the almond meal, desiccated coconut and the egg and mix to combine. Add the flour, baking powder and salt and mix to combine until it comes together. Wrap in plastic wrap and place it in the refrigerator to rest for 1 hour, until firm.

Preheat the oven to 160°C (315°F). Place eight individual 8 cm (31/4 inch) tart rings on a baking tray lined with baking paper.

Roll out the dough on a lightly dusted work surface to a thickness of 3 mm (1/8 inch) then line each tart ring with the rolled pastry. Place a large paper case in each tart ring and fill with uncooked rice. Blind bake for approximately 6 minutes, then remove the rice and paper case and bake the tarts for a further 6 minutes or until light golden brown. You can freeze them, baking them as needed. Remove the tarts from the oven, allow to cool and then remove the tart rings. The baked tarts can be made up to 3 days in advance and stored in an airtight container at room temperature.
Ingredients

180 g (61/2 oz) good-quality dark chocolate, coarsely chopped

50 ml (13/4 fl oz) cream (35% fat) (a)

70 ml (21/4 fl oz) coconut cream

1/2 teaspoon vanilla bean paste

160 ml (51/4 fl oz) cream (35% fat) (b)


Chocolate mousse

Put the chocolate in a bowl. Put the cream (a), coconut cream and vanilla bean paste in a saucepan over medium heat and bring to the boil. Pour the hot mixture over the chocolate, whisking by hand until the chocolate is melted and completely combined with the cream, creating a ganache. Place the cream (b) in a chilled bowl and whisk to a semi-whipped consistency. Immediately and gently fold the semi-whipped cream through the ganache by hand until combined.


Ingredients

4 g (1⁄8 oz) gold-strength gelatine sheets or 6 g (3⁄16 oz) powdered gelatine

110 g (33/4 oz) frozen raspberries

80 g (23/4 oz) caster (superfine) sugar


Raspberry jelly

Soak the gelatine sheets in a bowl of iced water and, once pliable, gently squeeze the sheets to remove any excess water. Set the sheets aside and leave at room temperature. If using the powder, sprinkle it over a bowl containing 30 ml (1 fl oz/11/2 tablespoons) cold water. Leave at room temperature until needed.

Combine the frozen raspberries with the sugar in a saucepan over medium heat. Cook until the sugar is dissolved and the mixture comes to a gentle boil. Remove from the heat and add the gelatine, stirring until it is dissolved and combined.
Ingredients:

Dutch-process cocoa powder, for dusting

shaved coconut, for garnishing

fresh raspberries, for garnishing


Finishing

Evenly divide the raspberry jelly into the base of each cooled tart. Spoon in the prepared chocolate mousse on top of the raspberry jelly to fill the tarts. Create a rough texture on the surface of the tart. Dust each tart with cocoa powder and garnish with shaved coconut and fresh raspberries. Eat immediately or store in the refrigerator for up to 24 hours.

White Chocolate Butterfly Cakes – Anneka Manning – BakeClass

BakeClass Cover_Jacket

Bakeclass- Anneka Manning – Murdoch Books

Today I made White Chocolate Butterfly Cakes – we tasted some for afternoon tea and the others will be frozen

(before cutting and filling) for next weekend when we have a few visitors arriving.

These are my favourite cup cakes – until I made these today I didn’t realise the flavour was from the melted white chocolate ads so much flavour -I  thought it was just from the vanilla.

Cut off the top – add a dollop of thickened cream or cream fraiche and some berry jam then add the “wings” – dust with icing sugar.

white chocolate butterfly cake 001